Best Peptides for Fat Loss Research 2026: A Comparative Guide
Why are 68% of metabolic studies still struggling to differentiate between simple appetite suppression and genuine cellular lipolysis? You’ve likely...
 Are you over 18 years old?
This website requires you to be 18 years or older to enter our website and see the content.
Are you over 18 years old?
This website requires you to be 18 years or older to enter our website and see the content.

Working with peptides can seem complicated, especially when it comes to getting the right amount for your needs. It involves mixing a dry powder with a liquid, and then figuring out exactly how much of that mixture to use. This guide is here to help break down the process, making it easier to understand and do correctly. We’ll look at the basics, how to use tools like the peptide reconstitution calculator, and some practical examples. The goal is to make sure you can handle this process with confidence.
Peptide reconstitution is the process of taking a peptide that has been freeze-dried, or lyophilized, and mixing it with a liquid solvent to turn it back into a usable solution. Think of it like rehydrating something that’s been dried out. This step is necessary because peptides are often shipped in a dry powder form to keep them stable and prevent them from breaking down before you get them. Once reconstituted, the peptide is ready to be measured and used. Getting this part right is pretty important for making sure you get the correct amount later on.
The liquid you use to reconstitute your peptide, known as the solvent, plays a big role. The most common solvent for peptides is bacteriostatic water. This isn’t just plain water; it contains a small amount of benzyl alcohol, which acts as a preservative. This preservative is key because it stops bacteria from growing in the vial once it’s been opened and used multiple times. Using plain sterile water, which lacks preservatives, is generally not recommended for multi-dose vials because it can become a breeding ground for bacteria after the first use. The amount of solvent you add directly affects the final concentration of your peptide solution.
This might sound complicated, but it’s actually a pretty simple idea: when you add a solvent to a peptide powder, the total amount of the peptide itself doesn’t change. If you have a vial with 5 mg of peptide powder and you add 1 mL of water, you still have exactly 5 mg of peptide in that vial. If you add 3 mL of water instead, you still have 5 mg of peptide. What changes is the concentration – how much peptide is packed into each milliliter of liquid. Adding more solvent just dilutes the peptide, spreading it out over a larger volume. This principle is the basis for all concentration calculations you’ll do later. It means you can choose how much solvent to add, but that choice will determine how much liquid you need to draw for your dose. The basic formula that governs this is: Concentration = Mass of Peptide / Volume of Solvent. For more detailed calculations, you can use a peptide reconstitution calculator.
Working with peptides can feel like a science experiment, and honestly, sometimes it is. The biggest hurdle for many people is getting the concentrations right. It’s not just about mixing things together; it’s about precision. That’s where a good peptide reconstitution calculator comes in. Think of it as your trusty sidekick, making sure you don’t mess up the math.
To get accurate results from any calculator, you need to feed it the right information. It’s like baking a cake – if you use salt instead of sugar, it’s not going to turn out well. For peptide reconstitution, there are a few key pieces of data you absolutely must have:
Getting these numbers right is the first step. If you input the wrong peptide amount, for example, your final concentration will be off, and that can lead to dosing errors. It’s really important to double-check these details before you even touch the calculator.
Once you’ve plugged in your numbers, the calculator spits out some results. The most common outputs you’ll see are the required volume of solvent to add and the final concentration of your peptide solution. Sometimes, it will also tell you the volume to draw for a specific dose. Understanding these outputs is key to accurate dosing.
Let’s say you want to achieve a concentration of 2 mg/ml. Your calculator might tell you that to get this, you need to add 2 ml of bacteriostatic water to a 5 mg vial. This means your final solution will have 2 mg of peptide in every 1 ml of liquid.
Another output might be the volume to inject. If your protocol calls for a 250 mcg dose, and your solution is 2 mg/ml (which is 2000 mcg/ml), the calculator will tell you to draw up 0.125 ml (or 125 mcg) of the solution. This is where the peptide dosing calculator really shines, simplifying complex conversions.
Using a calculator isn’t just about convenience; it’s about accuracy and safety. Guessing or using rough estimates can lead to significant errors. A calculator takes the guesswork out of the process, providing precise measurements every time. This is especially important when dealing with small volumes or when converting between different units.
Here’s a quick look at how it helps:
The goal is to have a reliable system for preparing your peptides. A calculator is a tool that helps build that system, reducing the chance of mistakes and making the whole process more straightforward. It’s about confidence in your preparation.
For instance, if you have a 10 mg vial and want a concentration of 5 mg/ml, the calculator will tell you to add exactly 2 ml of bacteriostatic water. This follows the basic formula for reconstitution. Without a calculator, you might miscalculate and add too much or too little water, resulting in a solution that’s too dilute or too concentrated.
Getting the concentration and dosage right is where the real precision comes into play. It’s not just about mixing things together; it’s about understanding the math that makes your peptide work as intended. We’re talking about turning that powder into a liquid with a specific strength, and then figuring out exactly how much of that liquid to use for your dose.
Think of concentration as how much of the active ingredient (your peptide) is packed into a certain amount of liquid. The basic idea is simple: more peptide in the same amount of liquid means a higher concentration. The formula is straightforward:
Concentration = Peptide Amount / Reconstitution Volume
It’s really important to keep your units consistent here. If your peptide amount is in milligrams (mg), you’ll want to convert it to micrograms (mcg) if your desired dose is in mcg. For example, if you have a 5 mg vial and you add 2 mL of bacteriostatic water, the first step is to convert the vial’s mass to micrograms: 5 mg * 1000 = 5000 mcg. Then, you can calculate the concentration: 5000 mcg / 2 mL = 2500 mcg/mL. This tells you that each milliliter of your mixed solution contains 2500 micrograms of the peptide. This concentration is fixed once you’ve mixed your vial, so you’ll use it for all subsequent dose calculations from that specific vial. This is a key step for accurate dosing, and tools like the Peptide Calculator can help you manage these numbers.
Sometimes, you might want a specific concentration for your reconstituted peptide, perhaps to make dosing easier or to fit a particular protocol. This is where you work backward a bit. You know the total amount of peptide in your vial (let’s say 5 mg, which is 5000 mcg) and you decide on a target concentration, like 2 mg/mL (or 2000 mcg/mL). To find out how much bacteriostatic water to add, you rearrange the concentration formula:
Reconstitution Volume = Peptide Amount / Desired Concentration
So, using our example: Reconstitution Volume = 5000 mcg / 2000 mcg/mL = 2.5 mL. This means you would add 2.5 mL of bacteriostatic water to your 5 mg vial to achieve a concentration of 2000 mcg/mL.
Once your peptide is reconstituted and you know its concentration (mcg/mL), calculating the volume you need to draw for a specific dose is the final step before injection. You have your target dose (e.g., 250 mcg) and you know the concentration of your solution (e.g., 2500 mcg/mL). The formula is:
Required Draw Volume (mL) = Target Dose (mcg) / Concentration (mcg/mL)
Using our earlier example where the concentration is 2500 mcg/mL and the target dose is 250 mcg: Required Draw Volume = 250 mcg / 2500 mcg/mL = 0.1 mL. This 0.1 mL is the actual volume of liquid you need to draw into your syringe. Remember, this calculation is specific to the concentration you created in your vial. If you mix a new vial with a different amount of water, you must recalculate. It’s a good idea to double-check your math, especially when dealing with small volumes. For instance, a common scenario involves a 10 mg vial reconstituted with 1 mL of water, aiming for a 250 mcg dose. The concentration would be 10,000 mcg/mL, and the draw volume would be 250 mcg / 10,000 mcg/mL = 0.025 mL. This small volume highlights why precise measurement is so important.
Always ensure your units are consistent before performing calculations. Mixing milligrams and micrograms, or milliliters and liters, without conversion will lead to significant errors in your final concentration and dosage.
Here’s a quick look at how the numbers work out for a common scenario:
| Vial Size | Water Added | Peptide Amount (mcg) | Concentration (mcg/mL) | Target Dose (mcg) | Required Draw Volume (mL) | Required Draw Volume (Units on U-100 Syringe) |
|---|---|---|---|---|---|---|
| 5 mg | 2 mL | 5000 mcg | 2500 mcg/mL | 250 mcg | 0.1 mL | 10 Units |
| 10 mg | 1 mL | 10000 mcg | 10000 mcg/mL | 250 mcg | 0.025 mL | 2.5 Units |
Understanding these calculations is key to safe and effective peptide use. If you’re ever unsure, it’s always best to consult a medical professional or use a reliable calculator to verify your results.
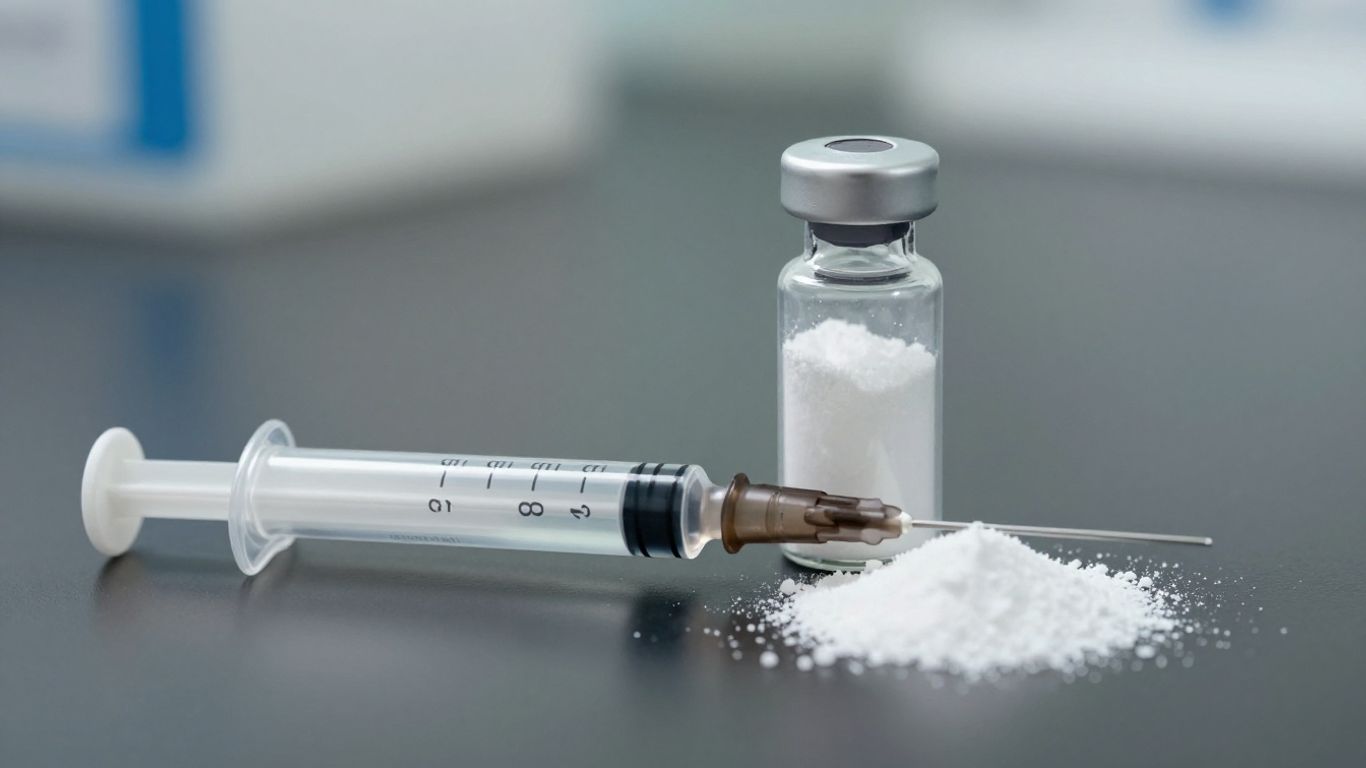
Insulin syringes, commonly used for peptide reconstitution, come in different calibrations. The most prevalent type for human use is the U-100 syringe. This designation means the syringe is calibrated for a concentration of 100 Units per milliliter (100 U/mL). A full U-100 syringe holds exactly 1 mL of liquid and is marked with 100 individual units. Therefore, each unit mark on the syringe represents 0.01 mL of liquid. This standardized measurement is key to accurate dosing. When your peptide calculator provides a volume in milliliters (mL), you simply convert that to the corresponding unit mark on your U-100 syringe. For instance, a calculated volume of 0.15 mL directly translates to the 15 Unit mark on the syringe.
Converting between milliliters and syringe units is straightforward, provided you are using a U-100 syringe. The conversion factor is simple: 1 mL equals 100 Units. To find the number of units to draw, you multiply the desired volume in milliliters by 100. For example, if your calculation indicates you need to draw 0.2 mL, you would multiply 0.2 mL by 100 to get 20 Units. This means you would fill the syringe up to the ’20’ mark.
Here’s a quick reference:
| Volume (mL) | Units (U-100 Syringe) |
|---|---|
| 0.01 mL | 1 Unit |
| 0.10 mL | 10 Units |
| 0.25 mL | 25 Units |
| 0.50 mL | 50 Units |
| 1.00 mL | 100 Units |
It is critically important to use the correct syringe type. The most common error involves confusing U-100 syringes with other calibrations, such as U-40 syringes often found in veterinary settings. A U-40 syringe is calibrated differently, with 40 Units equaling 1 mL. If you mistakenly use a U-40 syringe but follow U-100 calculations, you will administer 250% more peptide than intended, which can have serious consequences. Always verify that your syringe packaging explicitly states “U-100” to prevent potentially dangerous dosing errors. Using the right syringe for your needs is non-negotiable for safety.
The precision of your measurements directly impacts the effectiveness and safety of your peptide therapy. Understanding the markings on your U-100 syringe and performing the correct conversions are not optional steps; they are fundamental to accurate self-administration.
Let’s walk through some real-world scenarios to solidify your understanding of peptide reconstitution and dosing. These examples will show you how the math works and how to handle common situations.
Imagine you have a vial containing 5 mg of a peptide powder. You decide to reconstitute it with 2 mL of bacteriostatic water. Your research protocol specifies a target dose of 250 mcg. The question is, how many units should you draw using a U-100 syringe?
First, we need to make sure our units are consistent. Convert the vial’s mass from milligrams (mg) to micrograms (mcg):
5 mg * 1000 = 5000 mcg
Next, calculate the concentration of your solution. This tells you how many micrograms of peptide are in each milliliter of liquid:
Concentration (C) = Total Peptide Mass / Total Solvent Volume
C = 5000 mcg / 2 mL = 2500 mcg/mL
Now, determine the volume you need to draw to get your target dose:
Draw Volume (V_draw) = Target Dose / Concentration
V_draw = 250 mcg / 2500 mcg/mL = 0.1 mL
Finally, convert this volume into syringe units for a U-100 syringe:
Units = Draw Volume (mL) * 100 Units/mL
Units = 0.1 mL * 100 = 10 Units
So, to achieve a 250 mcg dose, you would draw exactly 10 units on your U-100 syringe.
Sometimes, you might want a very small dose from a large vial. If you add too little solvent, you can end up with a highly concentrated solution, making it difficult to draw the precise amount needed. Let’s look at an example.
Suppose you have a 10 mg vial and add only 1 mL of bacteriostatic water. Your target dose is 250 mcg.
10 mg = 10,000 mcgC = 10,000 mcg / 1 mL = 10,000 mcg/mLV_draw = 250 mcg / 10,000 mcg/mL = 0.025 mLUnits = 0.025 mL * 100 = 2.5 UnitsDrawing exactly 2.5 units is extremely difficult and prone to error. A small mistake could mean a significantly higher or lower dose. To avoid this, scientists often add more solvent than initially planned. For instance, adding 3 mL to the 10 mg vial would result in a concentration of 10,000 mcg / 3 mL = 3333.3 mcg/mL. To get the same 250 mcg dose, you’d draw 250 mcg / 3333.3 mcg/mL = 0.075 mL, which equals 7.5 Units. This larger volume is much easier to measure accurately.
The amount of solvent you add directly impacts the concentration of your peptide solution. While the total amount of peptide in the vial remains constant, altering the solvent volume changes how much liquid you need to draw for a specific dose. Adding more solvent dilutes the solution, making it easier to measure smaller doses accurately.
Let’s consider a common peptide, like BPC-157, which often comes in 5 mg vials. You’ve chosen to reconstitute it with 2 mL of bacteriostatic water, aiming for a daily dose of 500 mcg.
Step 1: Determine Concentration
Concentration = 5000 mcg / 2 mL = 2500 mcg/mL
Step 2: Calculate Required Volume
Volume = Target Dose / Concentration
Volume = 500 mcg / 2500 mcg/mL = 0.2 mL
Step 3: Convert to Syringe Units (U-100 Syringe)
Units = 0.2 mL * 100 Units/mL = 20 Units
Therefore, you would draw 20 units from the vial using your U-100 syringe to administer a 500 mcg dose. Always double-check your calculations, especially when dealing with different vial sizes or desired concentrations. For more complex scenarios or unit conversions, a reliable peptide reconstitution calculator can be an invaluable tool.
When you’re working with peptides, especially if you’re reconstituting them yourself, there are a few things you really need to pay attention to. It’s not just about mixing stuff; it’s about making sure what you end up with is safe and effective. Messing this up can lead to a few problems, from the peptide not working right to, well, worse.
This is a big one. You’ll see both “Bacteriostatic Water” (often called BAC water) and “Sterile Water” mentioned. They aren’t the same, and using the wrong one can be a real issue. Sterile water is just that – free of microbes. It’s meant for a single use, like when you’re reconstituting something you’ll use up right away. Bacteriostatic water, on the other hand, has a small amount of benzyl alcohol in it. This alcohol acts as a preservative. This preservative is what stops bacteria from growing in the vial after you’ve opened it. If you use plain sterile water for a multi-dose vial that you plan to use over several days or weeks, you’re basically creating a breeding ground for bacteria. That’s definitely not what you want.
Because peptides are often sold in larger quantities and intended for multiple uses, the preservative in bacteriostatic water is really important. Think of it like this:
Using BAC water means you can store the reconstituted peptide in the refrigerator and draw from it multiple times without worrying about contamination. Most sources suggest using a reconstituted vial within 28 days when stored properly in the fridge. After that, the peptide itself starts to degrade, and the preservative might not be as effective.
Once you’ve mixed your peptide powder with a solvent, its clock starts ticking. Lyophilized peptides are stable because they’re dry. Once reconstituted, they become much more fragile. Refrigeration is key for maintaining the integrity of reconstituted peptides. You should store them upright in the refrigerator, away from light. While peptides can handle being at room temperature for short periods, like during reconstitution or transport, prolonged exposure to heat or sunlight can speed up degradation. Always aim to keep them cool and dark when not in use. If you’re ever unsure about how long a specific peptide is good for after reconstitution, it’s best to check the manufacturer’s guidelines or consult reliable research. For most common peptides, using them within a month of reconstitution is standard practice, provided they’ve been stored correctly immediately after use.
The goal with proper handling and storage is to minimize the breakdown of the peptide’s molecular structure and prevent microbial contamination. This ensures that each dose you prepare is as potent and safe as the first.
When working with peptides, safety is super important. Always make sure you’re following the right steps to keep everything safe and sound. For more tips and to see our full range of products, check out our website!
So, we’ve gone over how to mix your peptides and figure out the right doses. It might seem like a lot at first, with all the numbers and units, but using a calculator really takes the guesswork out of it. Remember, accuracy is key here, and having a solid grasp on these calculations means you’re handling things properly. Don’t forget to always double-check your work and, most importantly, consult with a medical professional if you have any doubts. This guide and the calculator are tools to help you, but safety always comes first.
Reconstituting a peptide means mixing the dry, powdered form of the peptide with a liquid, usually a special kind of water called bacteriostatic water. This turns the powder into a liquid that can be measured and used.
Bacteriostatic water has a tiny amount of a preservative called benzyl alcohol. This helps stop tiny germs from growing in the liquid after you’ve opened the vial. Plain sterile water doesn’t have this, so it’s only good for one use.
The amount of liquid you add changes how concentrated the final liquid is. You need to figure this out based on how much peptide powder you have and how much you want in each dose. A calculator helps with these tricky math problems.
A U-100 syringe is a special kind of syringe marked for measuring liquids. The ‘100’ means there are 100 units in each milliliter (mL) of liquid. Using the right syringe and understanding its markings is super important to get the correct dose and avoid giving yourself too much or too little.
You need to know how much peptide is in the vial, how much liquid you mixed it with, and how much peptide you want in your dose. Then, you can use a formula or a calculator to figure out exactly how much liquid to draw into your syringe.
Once you mix a peptide, it starts to break down over time. It’s best to keep it in the refrigerator and use it within about 28 days. After that, it might not work as well, and the preservative might not be as effective.
 by
by