Navigating the Path to Accessing Retatrutide: Your Comprehensive Guide
Retatrutide has been getting a lot of attention lately, especially among people looking for new ways to manage their weight. It’s still early days for...
 Are you over 18 years old?
This website requires you to be 18 years or older to enter our website and see the content.
Are you over 18 years old?
This website requires you to be 18 years or older to enter our website and see the content.

Working with peptides can be a bit tricky, especially when it comes to getting them ready for use. You know, that whole process of mixing the powder with liquid? It’s called reconstitution, and doing it right is super important if you want your experiments or whatever you’re doing with them to actually work out. It’s not rocket science, but there are definitely some common mistakes people make that can mess things up. This guide is here to walk you through the steps, so you can get your peptides reconstituted properly and avoid those frustrating errors. We’ll cover everything from getting your supplies together to storing the final mix.
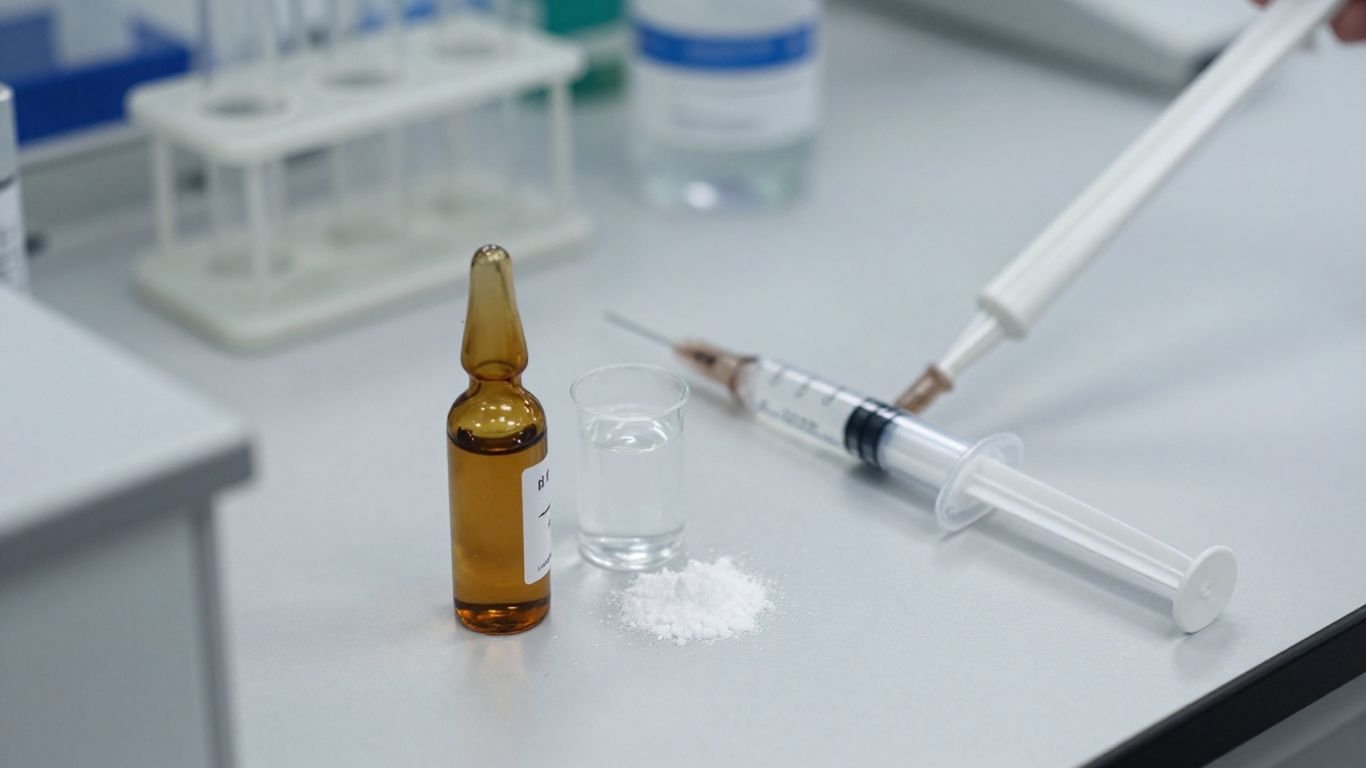
Before you even think about adding liquid to your peptide powder, taking a few moments to prepare properly can save you a lot of trouble later. It’s like getting your kitchen ready before you start cooking – having everything in place makes the whole process smoother and helps avoid mistakes. This section covers the basics you need to get sorted before you begin the actual reconstitution.
Having all your tools ready beforehand is key. You don’t want to be halfway through and realize you’re missing something important. Here’s a quick rundown of what you’ll likely need:
Peptides are sensitive molecules, and introducing unwanted bacteria or other contaminants can quickly ruin your sample. Working in a clean, sterile environment is absolutely critical. Ideally, this means using a laminar flow hood or a clean bench. If that’s not available, find the cleanest, draft-free area you can. Before you start, wipe down all surfaces you’ll be using with an appropriate disinfectant. Think of it as creating a mini clean room for your peptide.
Maintaining a sterile field isn’t just about preventing contamination; it’s about protecting the integrity and potential efficacy of your peptide. Even tiny microbes can start to break down the peptide chains, rendering your experiment useless.
When peptides arrive, they’re usually stored cold. Taking a vial straight from the fridge or freezer and exposing it to room temperature air can cause condensation to form inside the vial. Since lyophilized peptides are often hygroscopic (meaning they readily absorb moisture), this condensation can lead to clumping or degradation. So, before you open the vial, let it sit out and warm up to room temperature. This usually takes about 15-30 minutes. It’s a small step, but it helps prevent unwanted moisture from getting into your precious peptide powder. You can find more details on proper handling in peptide reconstitution protocols.
Reconstituting peptides might seem a bit daunting at first, but if you break it down, it’s really just a series of careful steps. Getting this right is super important for making sure your peptide works the way it’s supposed to. Think of it like preparing a delicate ingredient for a recipe – you wouldn’t just toss everything in a bowl, right? Same idea here. We want to be gentle and precise.
First things first, cleanliness is key. Before you even touch the peptide vial, make sure your hands are washed thoroughly. If you have gloves, put them on. Then, take an alcohol swab and wipe down the rubber stopper on top of the peptide vial. Give it a good minute to air dry. You’ll also want to clean the area where you’re working with an alcohol wipe. This whole process is about preventing any unwanted bacteria or other tiny things from getting into your peptide solution. It’s a simple step, but it makes a big difference in keeping your peptide pure and stable. You can find more details on proper preparation in guides like this one on peptide reconstitution.
Now, you need to figure out how much liquid, or solvent, to add. This isn’t a guessing game. You need to know the exact amount of peptide powder in the vial (it’s usually listed on the label or accompanying paperwork) and the concentration you want your final solution to be. The formula is pretty straightforward: Volume = Mass / Concentration. For example, if you have a 5mg vial of peptide and you want to make a solution that’s 1mg/mL, you’ll need to add 5mL of solvent. Getting this calculation right means your final dose will be accurate.
With your calculated solvent ready in a sterile syringe or pipette, it’s time to add it to the vial. Don’t just blast it in there. The best way is to insert the needle at an angle, aiming it towards the inside wall of the vial. Slowly let the solvent drip down the side. This gentle method helps the powder start to dissolve without creating a mess or damaging the peptide. Imagine pouring water onto a delicate sugar cube – you wouldn’t just dump the whole glass on it, you’d let it soak in. This slow addition prevents splashing and foaming, which can be problematic.
Once the solvent is in, you need to help the peptide dissolve. The absolute worst thing you can do here is shake it vigorously. Seriously, don’t do it. Shaking too hard can actually damage the peptide’s structure, making it less effective. Instead, gently swirl the vial. You can also tilt it back and forth or roll it between your hands. Most peptides will dissolve within a few minutes with this gentle approach. If it seems stubborn, just let it sit for a bit longer. Patience is really the name of the game here. You want a clear solution, and rushing the mixing process is a common mistake that can lead to problems down the line. For more on safe handling, check out this guide on reconstituting, injecting, and storing.
It’s important to remember that peptides are sensitive molecules. Treating them with care during reconstitution is not just about following a protocol; it’s about preserving their intended biological activity. Think of each step as a way to protect the peptide’s delicate structure from damage, whether from physical agitation or contamination.
After you’ve added the solvent, the next big step is making sure the peptide powder actually dissolves completely and that the resulting liquid is uniform. It sounds simple, but there are a few things to watch out for.
First off, take a good look at the vial. You want to see a clear liquid. If you notice any little bits floating around or stuck to the sides, that means the peptide hasn’t fully dissolved yet. Don’t proceed to the next step if you still see undissolved particles. It’s better to give it a bit more time and gentle mixing. Sometimes, peptides just need a little longer to break down into the solvent. You might need to let it sit for a few extra minutes, occasionally giving it a gentle swirl. If it’s really being stubborn, you could try a lukewarm water bath, but be careful not to overheat it.
Once it looks clear, you need to make sure the peptide is spread out evenly throughout the liquid. This is what we mean by homogeneity. If it’s not uniform, then when you take out a dose, you might get a lot of peptide one time and very little the next, which messes up your experiments. Gentle mixing is key here. You want to avoid anything that creates a lot of bubbles or shakes the vial violently, as this can actually make things worse by causing the peptide to clump up again or even break down.
Before you actually use the reconstituted peptide, give it one last check. Even if it looked fine earlier, sometimes peptides can settle or stick to the container walls over time. A quick, gentle swirl or a little flick of the vial should do the trick to mix it up again. This makes sure that whatever amount you measure out is the correct concentration. It’s a small step, but it really helps avoid dosing errors down the line. If you’re planning to use the peptide over several days, it’s a good idea to aliquot it into smaller, single-use tubes right after reconstitution. This way, you only have to mix and thaw what you need each time, preserving the rest. For example, if you reconstituted a 5 mg vial in 5 mL (making 1 mg/mL), you might aliquot 10 × 0.5 mL in separate tubes. This way, each tube contains 0.5 mg of peptide. Label each aliquot clearly with the concentration (e.g., “1 mg/mL”) and date. Having clearly labeled aliquots with known storage instructions (like “keep frozen”) prevents confusion and dosing mistakes later on. Remember to always check the manufacturer’s instructions for specific recommendations on reconstitution and storage, as some peptides have unique requirements. You can often find helpful tips on peptide reconstitution from suppliers.
Making sure your peptide is fully dissolved and evenly mixed is like making sure your ingredients are properly blended before baking. If they aren’t, the final product won’t turn out right. Patience and gentle handling are your best friends here.
The solvent you pick to reconstitute your peptide is a pretty big deal. It’s not just about getting the powder to turn into liquid; it’s about making sure the peptide stays stable and active. Using the wrong stuff can mess things up, leading to a peptide that doesn’t work right or just won’t dissolve at all. So, let’s break down the options.
First off, not all peptides are the same, and neither are all solvents. The amino acid sequence of a peptide plays a huge role in how it behaves in different liquids. Some peptides are naturally more water-loving (hydrophilic), while others prefer to avoid water (hydrophobic). You also need to think about the form the peptide came in – often it’s a salt, like acetate or TFA, which affects its solubility. The goal is to find a solvent that fully dissolves the peptide without damaging its delicate structure.
Here are the usual suspects when it comes to reconstituting peptides:
| Solvent Type | Common Use Cases | Potential Downsides |
|---|---|---|
| Sterile Water | Most standard peptides, short peptides | May not dissolve very hydrophobic peptides |
| Bacteriostatic Water | Longer-term storage, preventing bacterial growth | Preservative may interfere with some assays |
| Saline/Buffers | Injections, pH-sensitive peptides | Salt can affect solubility; buffer choice matters |
| Acetic Acid (dilute) | Difficult-to-dissolve peptides | Can alter peptide charge; use sparingly |
| DMSO | Highly hydrophobic or aggregated peptides | Can damage sensitive residues; requires dilution |
If you’ve tried sterile water and your peptide is still sitting there as a powder, don’t panic. Some peptides are just naturally trickier. For these, you might need to try a slightly different approach. Using a mild acid, as mentioned, is one way. Another common diluent for many research peptides is Bacteriostatic water (BAC water), which is often suitable for peptides like BPC-157 or CJC-1295. Always check the manufacturer’s datasheet for specific recommendations, as they know their peptide best. They might suggest a particular buffer or even a specific concentration of an organic solvent.
When in doubt, start with the simplest solvent, which is usually sterile water. If that doesn’t work, move to slightly more complex options like bacteriostatic water or a mild buffer. Only resort to stronger solvents like DMSO if absolutely necessary and if you’re confident it won’t harm your peptide or experiment.
Remember, the goal is to get a clear, homogeneous solution. If you’re seeing clumps or cloudiness after trying a solvent, it’s a sign that it might not be the right choice, or you might need to adjust your technique.
When you’re getting peptides ready for use, it’s easy to make small mistakes that can really mess things up. These aren’t usually super complicated issues, but they happen more often than you’d think. Paying attention to a few key things can save you a lot of trouble down the line.
It’s tempting to shake a vial hard if the peptide powder isn’t dissolving right away. But this is a big no-no. Vigorous shaking creates foam and can physically damage the delicate peptide structures, kind of like unraveling a fine thread. This process, known as denaturation, can make the peptide less effective or even useless. Instead of shaking, try gentle swirling or just letting the vial sit for a bit. Patience is really your best friend here. If it’s still not dissolving, a short time at room temperature might help, but avoid any rough handling. This kind of careful mixing is key to proper peptide reconstitution.
Not all peptides play nicely with plain water. Using the wrong liquid can lead to the peptide not dissolving at all or getting damaged. Always check what the manufacturer recommends. Some peptides might need a specific buffer or a dilute acid. Using something incompatible, like saline with an acetate-form peptide, can cause it to clump up and ruin the batch. It’s worth taking a moment to confirm you’re using the right stuff.
Sometimes, people get impatient and use a peptide solution even if there are still little bits floating around. This is a problem for a couple of reasons. First, you won’t know the actual concentration of the peptide you’re using, which messes up your experiments or treatments. Second, those undissolved bits can clog up needles or pipettes. Make sure the solution looks completely clear and uniform before you use it. If there are stubborn bits, try gentle mixing again or add a tiny bit more of the correct solvent to help it all dissolve. This is a common mistake that can affect peptide stability.
Keeping things clean is super important. Introducing bacteria or other contaminants can degrade your peptide pretty quickly. Always clean the vial stopper with an alcohol swab before you stick a needle in, and let it dry. Use a fresh, sterile needle and syringe every time you access a vial. Don’t touch the needle tip to anything other than the stopper and the liquid. Working in a clean area and being mindful of your technique helps prevent contamination. This attention to detail is vital for preserving the quality of your peptide solution.
So, you’ve successfully reconstituted your peptide. Great job! But the work isn’t quite done yet. How you handle and store that precious solution from this point forward is super important for making sure it stays effective. Think of it like storing leftovers – you wouldn’t just leave them on the counter, right? Peptides are similar; they need the right conditions to keep their potency.
One of the biggest enemies of reconstituted peptide stability is repeated freeze-thaw cycles. Every time you freeze and thaw a solution, you can introduce small amounts of degradation or aggregation. To avoid this, it’s best practice to aliquot your reconstituted peptide into smaller, single-use volumes. This way, you only thaw what you need for a specific experiment, leaving the rest frozen and undisturbed.
Where you store your reconstituted peptides makes a big difference. For short-term use, typically within a few days to a couple of weeks, storing the vials in a standard refrigerator (around 4°C) is usually fine. However, for anything longer, you’ll want to move to colder temperatures. Long-term storage at –20°C or –80°C is highly recommended to significantly slow down degradation processes. Avoid frost-free freezers, as the temperature fluctuations can be detrimental. Also, remember that some peptides are sensitive to light, so storing them in amber vials or in a dark location can be beneficial.
| Storage Duration | Recommended Temperature | Notes |
|---|---|---|
| Short-term (days-weeks) | 2-8°C (Refrigerator) | Minimize freeze-thaw cycles; return to fridge promptly after use. |
| Long-term (months-years) | -20°C or -80°C (Freezer) | Avoid frost-free freezers; aliquot for single use. |
The solvent environment plays a huge role in how long your peptide remains stable. Factors like pH and the presence of certain salts or excipients can either protect your peptide from degradation or accelerate it. Always check if the manufacturer provides specific recommendations for reconstitution and storage buffers, as these are often optimized for that particular peptide’s stability.
Even under ideal storage conditions, peptides in solution will eventually degrade. The rate of degradation depends on the peptide’s specific amino acid sequence, its concentration, the solvent it’s dissolved in, and the storage temperature. While lyophilized peptides are quite stable, once reconstituted, their shelf life is considerably shorter. Generally, you can expect reconstituted peptides to remain stable for a few days to weeks when refrigerated, and several months to a year or more when stored frozen at –20°C or –80°C. However, it’s always best to consult the manufacturer’s data or product information for specific stability timelines. If you’re unsure, it’s better to prepare fresh solutions or use a new aliquot than to risk using a degraded peptide, which could lead to unreliable experimental results. Remember, lyophilized peptides are generally more stable than their liquid counterparts.
Sometimes, even when you follow all the steps carefully, things don’t go perfectly. You might notice your peptide isn’t dissolving right, or the solution looks a bit off. Don’t worry, these are usually fixable problems. Let’s look at what might be happening and how to sort it out.
If you’re seeing clumps or particles that just won’t dissolve, it can be frustrating. This often happens when the solvent doesn’t mix evenly with the powder right away. The key is patience and gentle handling.
Here are a few things to try:
When a peptide refuses to dissolve, it’s easy to get aggressive. However, forceful methods like vigorous shaking can actually damage the peptide’s structure, making it less effective. Gentle, persistent mixing is almost always the better approach.
Seeing a cloudy solution after reconstitution can be concerning. It might look like fine particles or a general haze. This can happen for a few reasons:
If you’ve tried the troubleshooting steps and are still having issues, don’t hesitate to reach out to the company you purchased the peptide from. They often have specific knowledge about their products.
Having trouble getting your products ready to use? Don’t let common mix-up problems slow you down. We’ve put together some easy tips to help you solve these issues quickly. For more detailed help and to find the right solutions, visit our website today!
So, we’ve gone through the whole process of getting your peptides ready to go. It might seem like a lot at first, with all the talk about solvents and gentle swirling, but honestly, it’s mostly about being careful and clean. Think of it like making a delicate recipe – you wouldn’t just throw everything in a blender, right? Same idea here. By following these steps, like letting things warm up, adding the liquid just right, and giving it a gentle mix, you’re setting yourself up for the best possible results. It really just comes down to paying attention to the details. Do that, and your peptides should be good to use for whatever you need them for. Happy experimenting!
Freeze-dried peptides are like tiny, dried-up sponges that hold their strength for a long time. They are made by freezing and then drying them out to keep them stable. To use them for experiments or other tasks, we have to add a liquid, called a solvent, to bring them back to life, making them ready to work with.
The best liquid depends on the specific peptide. Often, plain sterile water works well. Sometimes, a special kind of water called bacteriostatic water is used. Other times, a mild salt solution or a weak acid might be needed. It’s always a good idea to check the instructions that come with the peptide to see what liquid is recommended for it.
Sure! First, let the peptide powder warm up to room temperature. Then, clean the top of the bottle with an alcohol wipe. Carefully measure the right amount of liquid and slowly add it to the bottle. Gently swirl the bottle around to help the powder dissolve, but don’t shake it hard. After it’s all mixed, store it properly.
For short periods, keeping the mixed peptide in the refrigerator (between 2 and 8 degrees Celsius) is usually fine. If you need to store it for a longer time, it’s best to put it in the freezer (at -20 degrees Celsius or colder). Try to avoid opening and freezing the liquid over and over again, as this can weaken the peptide.
Generally, mixed peptides can last for a few days to a few weeks if kept in the fridge. When frozen, they can often stay good for several months. However, it’s always best to check the specific information for your peptide, as some might last longer or shorter than others.
A big mistake is shaking the bottle too hard, which can damage the peptide. Also, using the wrong liquid or not cleaning everything properly can cause problems. Make sure to always add the liquid gently, avoid shaking, use the correct liquid, and keep everything clean to prevent contamination.
 by
by